The following papers by Linda Green, Jeff Schloss, and Julie Rector are reprinted with permission from The Volunteer Monitor (Vol. 3 (1): Fall 1991). Since this article was published some time ago, additional information has been added and is indicated in italics.
Secchi Disk and Viewscope Tips
by Linda Green, Rhode Island Watershed Watch
Secchi Disk
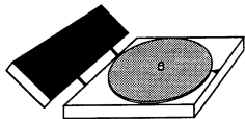
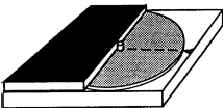
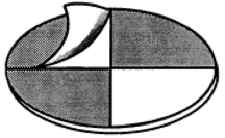
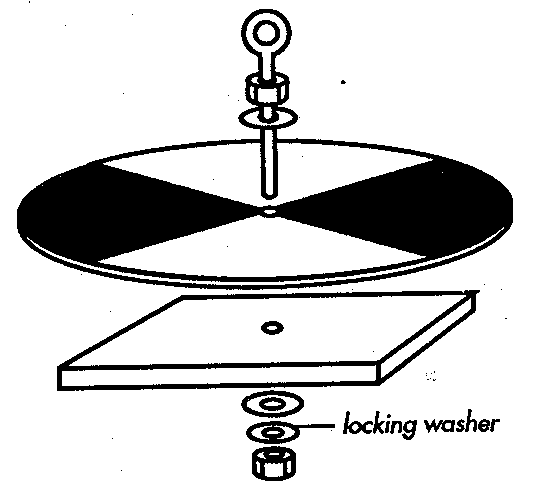
The Secchi disk is the basic tool of lake water quality monitors worldwide. It is always 8 inches (20 cm) in diameter and usually painted black and white. Secchi disks may be purchased for about $25-$30, but many volunteer monitoring groups make their own. A variety of materials can be used, including acrylic (see illustration), wood, or steel, or even aluminum pie tins. Rhode Island’s Watershed Watch uses 1/8 inch steel, cut by a local machine shop and primed and painted with automotive paints.
In situations where there is significant water flow, the disk should be weighted to ensure that it goes straight down. Some monitors have used a brick or a sand-filled plastic jug for this purpose. Beverly DeAngelis of the NY/NJ Baykeeper program harvests used auto stereo speakers from a local junkyard and dismantles them to get the heavy circular magnet inside. She says the hardest part is drilling a hole in the center of the magnet and recommends a sturdy drill with an expendable bit.
A calibrated line is attached to the Secchi disk in order to measure the maximum depth at which it is visible. The type of line used is very important. Avoid cotton clothesline because it stretches when wet. Jeff Schloss, of the New Hampshire Lakes Lay Monitoring Program, suggests using nonstretching white plastic-coated wire-core clothesline; bend and straighten the line before you buy it to see if it will lie straight. Julie Rector of Washington’s Citizen Lake Monitoring Project uses solid braid polyester line, which she preshrinks by soaking it and then hanging it out to dry. Most programs, including Watershed Watch, use nylon line.
Mark standard intervals (in feet or meters) with an indelible marker. Julie Rector uses red marker for 5-foot intervals and black for 1-foot intervals. Knots may be used either instead of, or in addition to, the marker. Whatever type of line you use, be sure to check periodically to make sure the distances you’ve marked haven’t changed due to shrinkage or stretching.
Additional Comments: An alternative to marking the line is used by the Ohio CLAM program. The line is left unmarked and the volunteer uses a yardstick to measure the distance from the disk to the Secchi depth, which was marked by a clothespin. This eliminates the need for a marked line and eliminates the problem of line shrinkage.
Another problem of a marked line is that the volunteer is usually asked to round the Secchi depth to the nearest mark on the line. Depending on the spacing of these marks and the actual Secchi depth, considerable error can be introduced into this measurement. Consider the error if the transparency were 2 feet and the volunteer is asked to round to the nearest foot.
An alternative line used by several programs is a nylon measuring tape, available from several suppliers. The line provides the accuracy necessary when dealing with shallow Secchi depths, but like marked lines may introduce a subtle bias if the observer watches the markings as they find the Secchi depth.
Viewscope
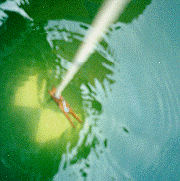
A common problem with Secchi readings is that different sky and light conditions can produce different levels of glare on the water, which, combined with wave action, can greatly influence the apparent Secchi depth transparency. Taking readings from the shady side of the boat is of some help, but many programs use a viewscope or view tube to shield out the glare. This is simply a tube, 2 to 3 feet long and about 4 inches in diameter, that is black on the inside and has a handle on one side. Hold the viewscope vertically about 6 inches into the water and look through it to observe the disappearance and reappearance of the Secchi disk. Monitors in New York and New Hampshire also use viewscopes to observe the type and extent of submerged aquatic vegetation.
Additional Comments: Glare is certainly a problem when viewing a Secchi disk and may introduce errors into the reading. However, viewing the disk on the shady side of the boat can also introduce error because the shadow of the boat will change the relative contrast between the disk and the surrounding water. The optimum method appears to be to view the disk on the sunny side of the boat with a viewscope. Be warned however, the viewscope may give a reading very different from that obtained without the use of one. It would cause all sorts of confusion if a monitoring program decided to change the viewing procedure or allowed some volunteers to use a viewscope. Consistency of method is very important!
Homemade Acrylic Secchi Disks
by Julie Rector, Washington Citizen Lake Monitoring Project
From a plastic supply house, order 20-cm diameter, 1/4″-thick white opaque acrylic disks with 3/8″ holes drilled in center. (Disks come with paper masking on both sides.)
How to Make a Viewscope
by Jeff Schloss, New Hampshire Lakes Lay Monitoring Program
| For a basic viewscope, you will need:
4″ diameter PVC pipe, black inside 1 handle, 3-4″ long 4 screws and nuts (to attach handle) |
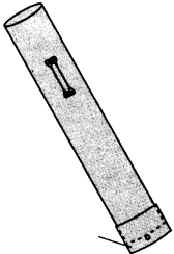 |
Cut a 2-3″ section of 4″ diameter PVC pipe. If you can’t find pipe with a black interior, paint the inside black. If the pipe is shiny black inside, use sandpaper to rough up the interior. Attach handle about 6″ from one end.
Optional refinement: Programs that monitor in choppy waters may want to modify their viewscopes by adding a Plexiglas “window” at one end. This prevents water from coming up inside the tube and interfering with visibility. Materials needed are:
4.5″ diameter Plexiglas disk
PVC coupling
Silicone rubber sealant
Glue the Plexiglas disk to the bottom of the tube, using silicone rubber sealant. Place a piece of PVC coupling over that end of the tube (like a collar) and seal with the silicone sealant. Drill two small (1/8″) holes in the side of the collar so that air won’t be trapped in the open end of the coupling when you put the viewscope into the water.


